Raspberry Pi カメラ映像を、WebRTC を使って PC ブラウザにリアルタイム送信するようにしました。今までVNCで操作していましたが、WebRTC を使うことで約100ms 前後の実用的な FPV(リアルタイム映像)になったと思います。
以下はMeta Quest3ゴーグルのブラウザで表示させた例です。右下あたりにRaspiカーがあって、そのPiカメラ映像を表示しているのがわかるかと思います。
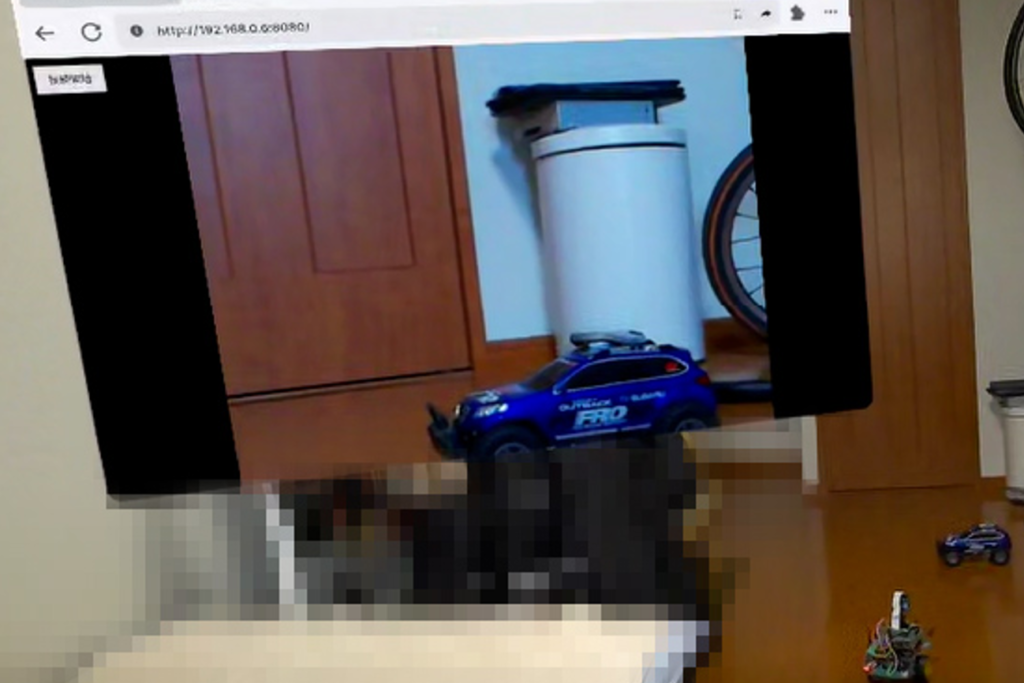
Quest3ゴーグル内の映像
構成図(Raspi → PC → FPVゴーグル)
Raspberry Pi(Picamera2)
    ↓ WebRTC 映像配信(aiortc)
Wi-Fi
    ↓
PC または、FPVゴーグルへ
必要なライブラリ(Raspberry Pi)
sudo apt update
sudo apt install python3-full python3-venv
仮想環境作成:
python3 -m venv webrtc-env --system-site-packages
source webrtc-env/bin/activate
依存ライブラリ:
pip install aiortc aiohttp av --break-system-packagesWebRTC サーバ(server.py)
import asyncio
import logging
import cv2

from aiohttp import web
from aiortc import RTCPeerConnection, RTCSessionDescription, VideoStreamTrack
from av import VideoFrame
from picamera2 import Picamera2

# ----------------------------------------
# ログを抑制(必要最低限)
# ----------------------------------------
logging.basicConfig(level=logging.INFO)
logger = logging.getLogger("webrtc")
logging.getLogger("aiortc").setLevel(logging.WARNING)
logging.getLogger("picamera2").setLevel(logging.WARNING)


# ----------------------------------------
# Picamera2 初期化(BGR実データをRGB888で取得)
# ----------------------------------------
picam2 = Picamera2()
camera_config = picam2.create_video_configuration(
    main={"size": (640, 480), "format": "RGB888"},
    controls={"FrameRate": 30}
)
picam2.configure(camera_config)
picam2.start()
logger.info("Picamera2 started")


# ----------------------------------------
# WebRTC へ流すための映像トラック
# ----------------------------------------
class PiCameraTrack(VideoStreamTrack):
    def __init__(self, picam2):
        super().__init__()
        self.picam2 = picam2

    async def recv(self):
        pts, time_base = await self.next_timestamp()

        # ★ Raspberry Pi からフレーム取得(実際は B,G,R の順)
        frame = self.picam2.capture_array()

        # ★ カメラが上下左右逆の場合 flip(-1)
        frame = cv2.flip(frame, -1)

        # ★ BGR24 として WebRTC へ送信
        video_frame = VideoFrame.from_ndarray(frame, format="bgr24")
        video_frame.pts = pts
        video_frame.time_base = time_base
        return video_frame


# ----------------------------------------
# WebRTC OFFER/ANSWER 処理
# ----------------------------------------
pcs = set()

async def index(request):
    with open("index.html", "r", encoding="utf-8") as f:
        return web.Response(text=f.read(), content_type="text/html")


async def offer(request):
    params = await request.json()
    offer = RTCSessionDescription(sdp=params["sdp"], type=params["type"])

    pc = RTCPeerConnection()
    pcs.add(pc)

    # 映像トラック追加
    video = PiCameraTrack(picam2)
    pc.addTrack(video)

    @pc.on("connectionstatechange")
    async def on_connectionstatechange():
        logger.info(f"Connection state: {pc.connectionState}")
        if pc.connectionState in ["failed", "closed", "disconnected"]:
            await pc.close()
            pcs.discard(pc)

    await pc.setRemoteDescription(offer)
    answer = await pc.createAnswer()
    await pc.setLocalDescription(answer)

    return web.json_response(
        {"sdp": pc.localDescription.sdp, "type": pc.localDescription.type}
    )


# ----------------------------------------
# サーバ起動
# ----------------------------------------
def main():
    app = web.Application()
    app.router.add_get("/", index)
    app.router.add_post("/offer", offer)

    logger.info("Starting WebRTC server on http://0.0.0.0:8080")
    web.run_app(app, host="0.0.0.0", port=8080)


if __name__ == "__main__":
    main()
ブラウザー(index.html)
WebRTC 接続処理を含む、最小の受信ページです。
<!DOCTYPE html>
<html lang="ja">
<head>
  <meta charset="utf-8">
  <title>Raspberry Pi WebRTC FPV</title>
  <style>
    body { margin:0; background:#000; }
    #video { width:100vw; height:100vh; object-fit:contain; }
    #start { position:fixed; top:20px; left:20px; padding:8px 16px; }
  </style>
</head>
<body>

<button id="start">接続開始</button>
<video id="video" autoplay playsinline></video>

<script>
let pc = null;

async function start() {
  pc = new RTCPeerConnection({
    iceServers: [{ urls: "stun:stun.l.google.com:19302" }]
  });

  pc.ontrack = (event) => {
    document.getElementById("video").srcObject = event.streams[0];
  };

  const offer = await pc.createOffer({ offerToReceiveVideo: true });
  await pc.setLocalDescription(offer);

  // ICE candidate が揃うまで待つ
  await new Promise(resolve => {
    if (pc.iceGatheringState === "complete") resolve();
    else pc.addEventListener("icegatheringstatechange", () => {
      if (pc.iceGatheringState === "complete") resolve();
    });
  });

  const response = await fetch("/offer", {
    method: "POST",
    headers: { "Content-Type": "application/json" },
    body: JSON.stringify(pc.localDescription)
  });

  const answer = await response.json();
  await pc.setRemoteDescription(answer);
}

document.getElementById("start").onclick = start;
</script>

</body>
</html>
サーバ起動 & 接続手順
Raspiでのターミナル操作はVNC接続でPCから行い、カメラ映像はwebRTCで受信します。
まずはRaspi上にて、
hostname -I例:192.168.x.xx などIPアドレスを確認
python3 server.pyサーバ起動(server.py と index.html が同じフォルダにあること)
PC or ゴーグルで ブラウザーを開いて:
http://192.168.x.xx:8080- 「接続開始」ボタンを押す
- 1〜2秒でカメラ映像が出るはずです
- ブラウザを 全画面表示 にして出力するとFPV表示になります。
以上